
Setting up NativeOS on NetBeans
Abstract.- The support for C/C++ and Assembly code in NetBeans is surprisingly well. If you want to hack NativeOS but you are afraid of more powerful tools such as Vim, NetBeans has features that makes it easy to start developing on any platform using a point and click user interface.
Last Updated: 2017-06-12 18:55
It sounds like a bad joke because I never liked NetBeans. Yet so far has been the multiplatform graphical editor with the best support outside Vim. It has code suggestions a-la-IntelliSense and it actually supports Intel ASM fairly well.
Get the tools
- Get NASM and the i386-elf toolchain. You know, there is a PKGBUILD if you are running an Arch based distro or a Homebrew tap if you are using macOS. For other platforms you’ll have to work out things manually. Extract it somewhere.
- Get NetBeans C/C++ from the download page. NetBeans All is OK too if you want to try it for something else. If you already have NetBeans for Java or Web you may be able to install the C/C++ module from Tools | Plugins.
Add the toolchain
You previouslly installed the i386-elf toolchain. On Linux and macOS they will usually be in a location such as /usr/bin or /usr/local/bin. If you’re on Windows and you have trouble during this step, place all the binaries on the same folder. Go to Settings | C/C++ | Build Tools and add the toolchain.

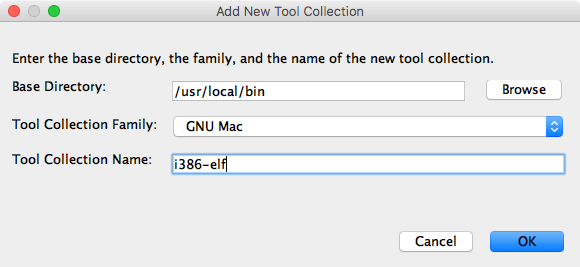
Press Add to add a toolchain. Set base directory to the directory where all your tools are installed. Set the tool collection family to GNU based and give it a name.
Then set the locations for the C Compiler, the C++ Compiler and the Debugger to i386-elf-gcc, i386-elf-g++ and i386-elf-gdb, respectively; plus, the Assembler to NASM – it doesn’t even have to be on the same location.
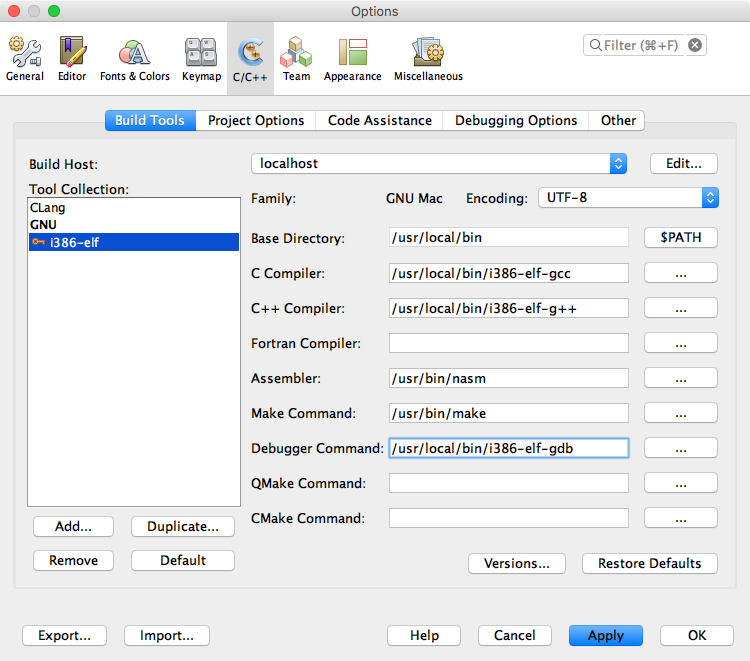
Finally press OK to set the changes.
Get the code
The code lives on GitHub. To get upstream code, clone https://github.com/danirod/nativeos.git.
Import the code
Create a new project via File | New Project | C/C++ | C/C++ Project from Existing Sources.

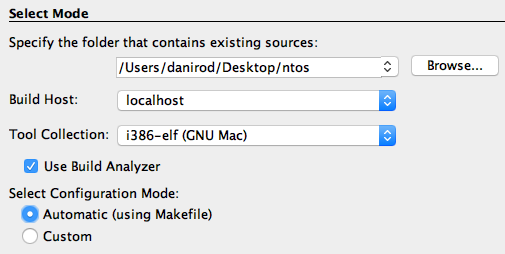
In the next step, what you’ll want to do is locate the directory where you cloned the project. Set the build host to localhost, and change the Tool collection to i386-elf or whatever toolchain you have just added earlier. We are using Makefiles here at NativeOS so you can keep it on.
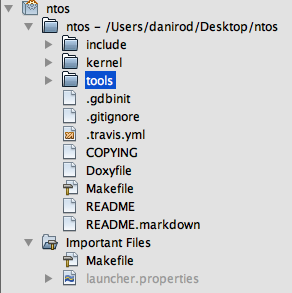
Press Finish. And there goes your project.
Because you set the project type to Makefile, by default Building the project from NetBeans will trigger make, which will, in fact, build the kernel image, nativeos.elf. Cleaning the project will trigger make clean, that will cleanup the working directory.
Hack the code
I mean. I don’t love NetBeans. But the support for C/C++ and Assembly code, both Intel and AT&T syntax is impressive. It even suggests functions and if you try to import a function referenced in a different header file it will automatically #include it.
Run QEMU
Yeah, you can change the behaviour of the Run project button to trigger make qemu. Just make sure you installed QEMU (qemu-system-i386, actually) first. The thing is that the Run project button will probably not recognize nativeos.elf as something runnable. Therefore, we have to tweak the button in order to make it run make qemu.
Just go to the Project Properties, and in the Run settings, change the command to make qemu. Press OK. Now run the project and, as long as running make qemu through the terminal works (make sure it is in your PATH and so on), it will work on NetBeans as well.
